6.3 Project properties dialog
This dialog can be used to configure the global project settings. It is
mainly used to tell Hollywood how it shall display your project.
The dialog consists of the following pages: General, Display, Backfill,
Scaling, Icons, Languages, Text, Linker, Plugins, Keyboard, Custom code, Other, and
Advanced.

a) General
The first page can be used to define some general properties, i.e. you
can set the author of the project, copyright, version string and
a description of your project. You should also enter the Hollywood version
that your project requires. The contents of the text field "Title" will
be shown in the title bar of your project window (if the window has
a border). All other settings are only for information purposes.
A unique project identifier must be set in case you want your project to be
able to remember certain user selections and inputs when it is closed and
restarted again. For example, Hollywood Designer projects can remember their
window position and size if the "Remember position and size" option is set on
the "Display" page of the project properties dialog. Also, Hollywood Designer
supports editable text objects. The user can change the contents of those text
objects by clicking on them. All those features that save individual user settings
require a unique project identifier. This identifier must be specified in reverse
DNS notation, e.g. "com.airsoftsoftwair.test", and no Hollywood Designer projects
must use the same identifier. See User settings for details.
The "Delete project user data" button can be used to delete all user selections
that your project has remembered, e.g. the last language used if the
"Remember this language change on next start" option was selected in the Change language
action event, the window's position and size, selections that were made using
the Choose file to open action event and so on.
See User settings for details.
b) Display

The display page is used to define how your project shall be shown.
Mode can be one of the following settings:
- ‘Window’
-
The project will be shown in a window. You can configure the window style
by using the options available below.
- ‘Full screen’
-
The project will be shown in full screen mode.
You can configure the desired full screen mode using the
widgets below.
You can also configure the monitor your project should be opened on.
If the display mode has been set to "Full screen", you can set the exact full
screen configuration using the widgets below. The following options are
available for full screen configuration:
- ‘Mode’
-
This can be used to set the desired full screen mode. This can be one of the
following modes:
- ‘Best fit’
-
This will let Designer decide what full screen mode is the best for the platform
your project is running on. On systems that support GPU-accelerated scaling like
Windows or macOS this usually means that Designer won't switch the monitor's resolution
but simply scale your project to fit the current monitor's resolution. On slower
systems like AmigaOS it usually means that Designer will switch the monitor's
resolution to fit to the project's one so that scaling isn't necessary.
- ‘Best fit (force resolution change)’
-
If you use this option, Designer will always adapt the monitor's resolution to
that of your project. Note that this isn't recommended on mobile devices like
Android or iOS because mobile device displays can't change their resolution like
desktop monitors can.
- ‘Best fit (force no resolution change)’
-
If you use this option, Designer will always scale the project to fit the
monitor's resolution. Note that this can be very slow on systems lacking CPU
power like AmigaOS.
- ‘Use screen mode requester’
-
If you use this option, Designer will show a screen mode requester asking the
user to select a screen mode for your project.
- ‘Use fixed screen mode’
-
If you select this mode, you will have to select a fixed screen mode to use
from the resolutions listed in the "Size" widget below. Keep in mind that
hard-coding a certain screen mode can lead to problems when running your
projects on other systems that don't have the requested screen mode.
- ‘Use fixed screen mode (custom)’
-
If you select this mode, you will have to enter the desired screen mode for
your project in the "Width" and "Height" fields below.
- ‘Orientation’
-
Here you can set the desired orientation for your project. This is only used
when running your project on mobile devices like Android or iOS. It allows
you to hard-code a display orientation that your project should use, e.g.
landscape or portrait mode. If you do this, your project will never auto-rotate
when the user rotates the device. If you'd like your project to auto-rotate,
simply set the orientation to "Default".
- ‘Hide screen's title bar’
-
If you tick this checkbox, the title bar of the screen your project
is running on will be hidden. If Hollywood opens a window on Workbench, this
attribute has only effect if you specified a backfill in the third page. This
backfill will be installed then in a way that it hides the title bar of the
Workbench screen.
- ‘Use anti-aliased scaling’
-
This is only available if you choose "Best fit (force no resolution change)".
In that case, you can set here whether or not anti-aliased scaling should be
used.
Furthermore, you can also configure the window style to use when your
project is run in windowed mode:
- ‘Borderless window’
-
Tick this checkbox to make your project's window borderless.
- ‘Fixed window’
-
If you tick this checkbox, your project's window will be fixed and cannot
be moved. You should only use this if your window is borderless because you might
confuse the user otherwise.
- ‘Resizeable window’
-
Tick this checkbox to make your project's window resizeable.
- ‘Hide window’
-
If you activate this option, Hollywood Designer will always start your
project with its display hidden. This can be useful if you would first
like to run some custom code and then manually show your display.
- ‘Remember window position and size’
-
If you set this option, your project will remember the position and size
of its window. Obviously, this makes only sense when using windowed mode. Note
that if you select this option, you also need to assign a unique identifier to
your project on the "General" page. See User settings for details.
Finally, there are some other display settings that can be configured on this
page:
- ‘Allow user change of display settings’
-
This option is only effective when you save your project as an executable or
a Hollywood applet. If you select this option, the user will be able to modify
the display settings you configured in this dialog. For example, if you choose
your project to run in full screen mode, the user would be able to change this back
to window mode by passing a command line argument or using a Hollywood
configuration file. If you do not want that, leave this checkbox unticked.
- ‘Disable screenblanker’
-
Select this option if Hollywood Designer should disable the screenblanker
while your project is running.
- ‘Support high-DPI displays’
-
Tick this checkbox if your project should be sensitive to high-DPI displays.
By default, your project will automatically be upscaled on high-DPI monitors
like Apple Retina displays. This can lead to a blurry appearance, though. If
you want your project to natively support high-DPI displays, tick this checkbox.
Note that in this case you should also make sure that you use one of the layer scaling
modes so that vector graphics will be scaled without any quality losses, giving
you a perfectly crisp appearance.
c) Backfill

The third page allows you to configure the backfill of your project.
A backfill could for example be just a black shielding window, or a picture,
a pattern or a gradient. If you define a backfill, it will fill the whole
background area of your screen that is not used by Hollywood. If you set
the checkmark "Hide screen's title bar", the backfill will also be displayed
over the title bar of your screen. The following backfill types are possible:
- ‘None’
-
Your project will not get a backfill. It will be opened as a
simple window on Workbench or your own screen.
- ‘Single color’
-
The background will be filled with color you specify in
the color field "Color 1".
- ‘Gradient’
-
A color fade will be calculated between the two colors in
the color fields and it will be displayed as the backfill. The color fade
begins with "Color 1" and ends with "Color 2".
- ‘Picture’
-
An image file will be displayed as the background. You can select
it by using the file requester on this page. You can also select a color
that shall be displayed transparently if you activate the checkmark
"Enable transparency". Additionally you can specify that the picture shall
be scaled to fit the whole backfill area. Finally you can specify the
position where your picture shall be displayed, e.g. top left or center.
The position setting of course makes only sense if you do not have the
"Scale picture" option activated.
- ‘Picture + backfill color’
-
This mode is a combination of the modes "Picture"
and "Simple color". It shows the picture and fills the background with
the specified color.
- ‘Picture + backfill gradient’
-
This mode is a combination of the modes "Picture"
and "Gradient". It shows the picture and fills the background with the
specified gradient.
- ‘Pattern’
-
The background will be filled with the image file you specify.
The file will be drawn in a way to fill out the complete background area.
d) Scaling

This dialog page allows you to promote your project to a different
resolution. This is very useful if you need your project in a larger
(or smaller) resolution but of course you do not want to adapt the layout
of all your pages manually. On this page, you have to choose the desired
scaling engine (layer scaling is highly recommended here for best results
and speed), as well as the desired output resolution. Furthermore, you can
configure whether or not interpolated scaling should be used. Note that the
settings here affect your project only when running it. The resolution
of the pages in your project will be left untouched.
If you select "Always keep proportions", Hollywood Designer will take care
that the aspect-ratio of your pages will never be changed. Thus, pages
will never appear distorted if you select this option.
e) Icons

This dialog page allows you to choose a set of icons for your project.
The icons you configure here will be linked into your project when you
save it as an executable. Icons should be provided in PNG format with alpha
channel transparency for the best look. Also, icons must be exactly of the
specified size. Note that embedded icons in executables are only supported
by Microsoft Windows, macOS, and Linux at the moment.
f) Languages

This dialog page allows you to manage all languages supported by your
project. You can add, remove, and rename languages on this page. Please see
the chapter Localizing your projects for more information.
If you select the "Append language name to all external programs" option, Hollywood Designer
will append the name of the current language to all external programs started by the "Run program"
action event. This is useful in case you want to launch different programs depending on
the currently active language. Note that if the current language is "Default", nothing will
be appended.
g) Text

This page allows you to configure where Hollywood Designer should store
the contents of editable text objects. Normally, this should be set to
"Use preferences", which means that the contents of editable text objects
are stored using Hollywood's preferences manager. Note that you need to
assign a unique identifier to your project in the "General" tab if you
choose "Use preferences". Alternatively, you can also specify two custom paths to
use for saving the contents of editable text objects.
Additionally, you can specify whether or not a password needs to be
entered before the user will be able to edit text objects. If you activate the
"Only ask for password once per session" option, the user will not be asked for
the password any more as soon as he has successfully entered it once.
h) Linker

This page allows you to configure options that will be passed to the linker
when you compile your project as an executable. You can choose which plugins
should be linked to your project when you compile it as an executable and you
can also configure whether data files and fonts should be linked to your
executable. Finally, you can enable or disable compression here.
Choosing to link all external files into your output executable is quite
convenient if you want to have everything in one file, e.g. for taking the
executable with you on a USB stick, etc. However, make sure to check the
licenses of all files, fonts, and plugins you want to link to your program.
Lots of fonts are copyrighted and require a permission for embedding them into
documents. You can circumvent this problem by using the fonts that are inbuilt
in Hollywood Designer. See Text dialog for details.
i) Plugins

Here you can select the plugins which are required by your project. Designer
will make sure then that those plugins are available when starting your project.
Note that the plugins you select here won't be automatically loaded by Designer
at startup but only by Hollywood when it runs your project. If you want Designer
to load the plugins as well, you need to select them in the preferences.
See Preferences for details.
j) Keyboard

This page allows you to define one or more keyboard shortcuts that shall be
active while your project is running. If you want to use multiple shortcuts,
simply separate them using commas. If you don't want to have any shortcut for
a certain operation, just leave the corresponding text entry widget empty.
Note that even though this section is called "Keyboard", you can actually
also use the mouse buttons as shortcuts using the special codes LMB
for the left mouse button, RMB for the right mouse button and MMB for the
middle mouse button.
You can also define shortcuts for pages in your project. If you do so, Designer
will automatically jump to the corresponding page whenever the shortcut is
pressed.
Furthermore, there are some options containing Hollywood shortcuts on this
page:
- ‘Disable switching between full screen and window mode via CMD+RETURN’
-
Tick this checkbox if you don't want to be able to switch between windowed and full screen
mode using CMD+RETURN.
- ‘Disable quit via CTRL+C’
-
By default, Designer projects will quit when pressing CTRL-C. Tick this checkbox
if you don't want this.
- ‘Disable hide via CMD+H’
-
By default, Designer projects will hide when pressing CMD-H. Tick this checkbox
if you don't want this.
k) Custom code
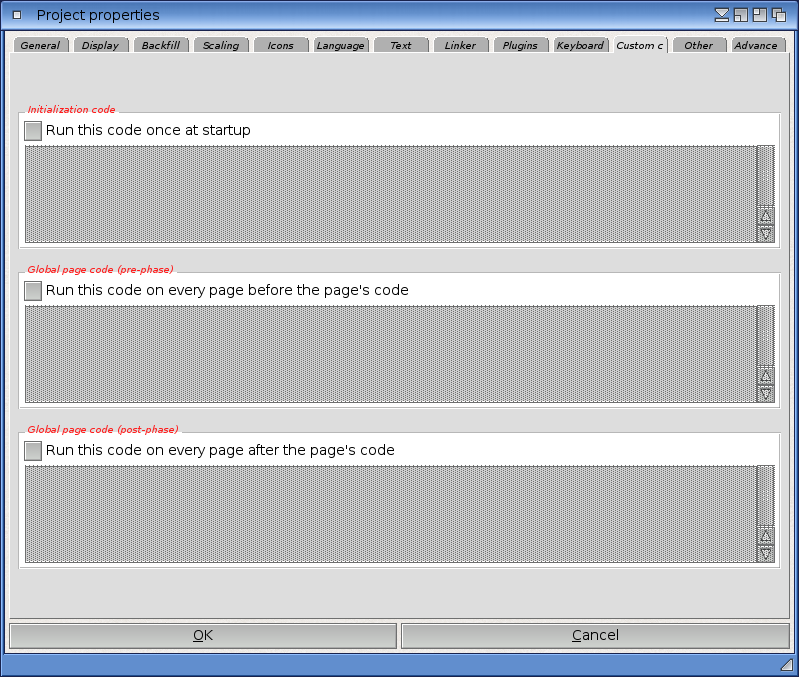
This dialog can be used to enhance your project with custom code. You can
provide custom code for three different contexts: Code that is executed
once at startup, code that is executed before each page and code that is
executed after each page. This can be useful for fine-tuning your project
with custom code.
l) Other

This page can be used to specify some other properties. First and foremost you
can configure the presentation mode here. The following options are available:
- ‘Presentation mode’
-
This can be used to set how Designer should run your project. This can be one of
the following options:
- ‘Wait for presenter at page end’
-
If you choose this mode, Designer won't automatically skip to the next page but
will wait until the user presses one of the forward keys defined in the "Keyboard"
section of the project properties dialog every time it reaches the end of a page.
- ‘Automatically skip to next page’
-
If you choose this mode, Designer will automatically skip to the next page once
it reaches the end of a page except when the page uses interactive elements such
as buttons. In that case, Designer won't skip to the next page automatically (but
you can override this behaviour by ticking the "Automatically skip to next page
even if page has interactive elements" checkbox, see below).
- ‘Run in browse mode’
-
If this is selected, Hollywood Designer will skip all transition effects, delays, and
wait action objects. This allows you to quickly browse through the pages of a project
using the page forward and backward shortcuts.
- ‘Loop project’
-
Select this option if you want the project to jump back to the first page when it
reaches the end of the project.
- ‘Wait for FX to finish before skipping to next page’
-
If you select this option, Designer will wait for all asynchronous transition
effects that are currently being displayed to finish before skipping to
the next page. You could achieve the same results by adding an action
object containing the Wait all FX action event to the end of all your
pages, but using this global option is of course much more convenient. This
is only available if the presentation mode is "Automatically skip to next page".
- ‘Automatically skip to next page even if page has interactive elements’
-
If a page contains buttons or keyboard
events and the presentation mode is "Automatically skip to next page" (see above),
Hollywood Designer will still halt the project when it reaches the end of a page to
wait for user input. If you do not want this behaviour, activate this
option. In that case, Hollywood Designer will jump to the next page as
soon as it reaches the end of the current page - even if the current page
defines button and keyboard events. This is useful if the events on
the current page have the "Immediate availability" flag set or if you
manually call the Wait event action event somewhere in your page.
- ‘Skip all hide object action events’
-
If this is selected, Hollywood Designer will skip all hide object action events when in
browse mode.
Furthermore, the following graphics settings can be configured on this page:
- ‘Use curve-based vector graphics’
-
If you enable this option, all vector shapes
will be drawn as real vector graphics. This makes round shapes like
circles and ellipses look much better because they will now be drawn
using Bézier curves.
- ‘Draw curves as line-based polygons’
-
Prior to Hollywood Designer 5.0 curved shapes with antialias were drawn as
line-based polygons. For aesthetic reasons, this was changed in Hollywood
Designer 5.0 to use real vectorgraphics instead. If you want to have the
old look, activate this option and Hollywood Designer will draw them as
it did before 5.0.
- ‘Don't apply transparency to shadow’
-
Before Hollywood Designer 6.0, shadows didn't automatically inherit the
transparency setting of their parent. This has been changed for Hollywood
Designer 6.0 so that the object transparency is always applied to shadows
as well now. For compatibility reasons, however, there is this option
which enforces the old behaviour and is automatically activated for projects
saved by older Designer versions.
Furthermore, the following sound settings can be configured on this page:
- ‘Disable sound’
-
Globally disable sound output (mute mode).
- ‘Allow playback of multiple sound streams’
-
When starting a new sound stream, Hollywood Designer will automatically stop
playback of existing sound streams. If you do not want that, activate this
option.
Furthermore, the following mouse pointer settings can be configured on this
page:
- ‘Hide pointer’
-
Tick this checkbox and the mouse pointer will be hidden
while your project is running. You should only use this if Hollywood runs
in full screen mode, because it could confuse the user otherwise.
- ‘Show busy pointer’
-
Tick this checkbox and Hollywood will show the busy
pointer if it is currently busy loading data from disk. This is useful
if you want to see when the program is really busy and when it is only
waiting.
Finally, the following settings can be configured on this page:
- ‘Preload all pages on startup’
-
If you select this option, Hollywood Designer
will preload all pages on startup. This will require lots of memory and
projects will take longer to start. Thus, it is only recommended for projects
that use a global timeline and need to jump between pages very quickly and
efficiently. In that case, it is recommended to have to whole project
preloaded because otherwise it could take too long and there would be a
risk of getting out of sync with the timeline.
- ‘Compress project file’
-
Select this option if your Hollywood Designer project file (.hwd) should
be compressed whenever you save your project. By default, Hollywood Designer
project files are uncompressed.
m) Advanced

This page allows you to configure some advanced settings for your project.
To enable password protection of your project, simply activate the
corresponding checkbox and enter a password. You can also specify a
numeric value that specifies the number of attempts the user should
have for entering the password. Enter 0 for unlimited attempts.
You can also activate magic word protection. In that case, your project
will only start if it is passed the magic word via a console argument.
For example, if you specify "secret" as a magic word, then your project,
when compiled as an executable, will only start if it is passed the
console argument "-secret".
You can also declare a page in your project as a screenblanker page.
To create a blanker page for your project, activate the corresponding
checkbox and select a page from your project that should be shown after
the user has been inactive for the specified time. If you select the
option "Always return to first page", Designer will always jump to the
very first page of your project after the blanker has exited. Otherwise,
it will return to the page that had been active last before the blanker
skipped in.
Finally, you can specify the storage locations for contents of
user-configurable action events as well as for broken links. Normally, this
should be set to "Use preferences", which means that the data is stored
using Hollywood's preferences manager. Note that you need to assign a unique
identifier to your project in the "General" tab if you choose "Use preferences".
Alternatively, you can also specify custom paths to use here. User-configurable
action events are action events that can remember user actions, e.g. the
Choose file to open action event can remember
the file the user selected in a file requester. See User settings for details.
If you activate the "Allow user to fix broken program links" option, the user
will be prompted to select an alternative program to run in case a Run program
action event fails because the specified file does not exist. In that case, the user's
selection will also be permanently saved in the path you specify below.
This should normally be set to "Use preferences", which means that the data is stored
using Hollywood's preferences manager. Note that you need to assign a unique
identifier to your project in the "General" tab if you choose "Use preferences".
Alternatively, you can also specify a custom path to use here.
See User settings for details.
Show TOC